In short
Shower waterproofing is the layer behind the tile that actually keeps water out of your walls and floor. Tile and grout let moisture through, so a proper shower has cement board on the walls, a sloped floor, and a continuous liquid or sheet membrane over everything, sealed at corners, niches and the valve, then flood tested before tile goes on.
Key takeaways
- Grout is porous, so the tile surface is a finish, not a water barrier.
- Cement board gives tile a stable base that will not rot, but it is not waterproof on its own.
- A continuous membrane, liquid or sheet, over the walls and sloped floor is what keeps water out of the house.
- A flood test before tiling proves the shower floor holds water while repairs are still easy.
When a tiled shower fails, the tile often looks fine. The trouble shows up somewhere else: a stain on the ceiling below, a baseboard that swells, a musty smell that never quite clears, or grout that stays dark long after the shower is dry.
That is because shower waterproofing is not the tile. It is a set of layers you never see once the job is done, and it decides whether your shower lasts for decades or starts rotting the wall within a few years. Here is what goes behind the tile, in the order it is built.
Why aren't tile and grout waterproof?
Porcelain tile itself absorbs very little water. Grout is a different story. Cement-based grout is porous; it wicks moisture through to whatever is behind it every time you shower. Sealers slow that down, but they wear, and they never make grout a barrier.
Water also finds every hairline crack, every gap at a corner, and every penetration where a valve or shower head comes through the wall. Over years, even a small amount of moisture getting past the tile adds up.
So a well-built shower assumes water will get through the tile and grout, and puts a continuous waterproof layer directly behind it. The tile is the finish. The membrane is the protection.
The layers, from the studs out
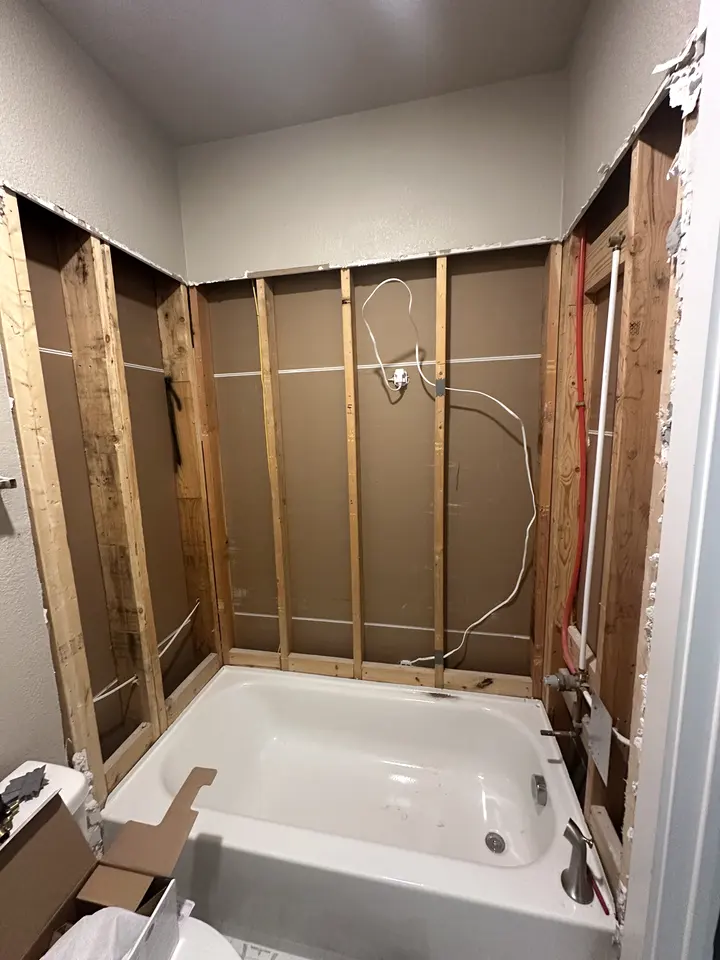
A modern tiled shower is built in a set sequence. The details differ between systems, but the logic is the same:
- Framing and blocking. The studs are checked for straightness, and blocking is added for grab bars, glass hardware and niches.
- Floor pre-slope. The shower floor is built up with mortar that slopes toward the drain, typically about 1/4 inch per foot.
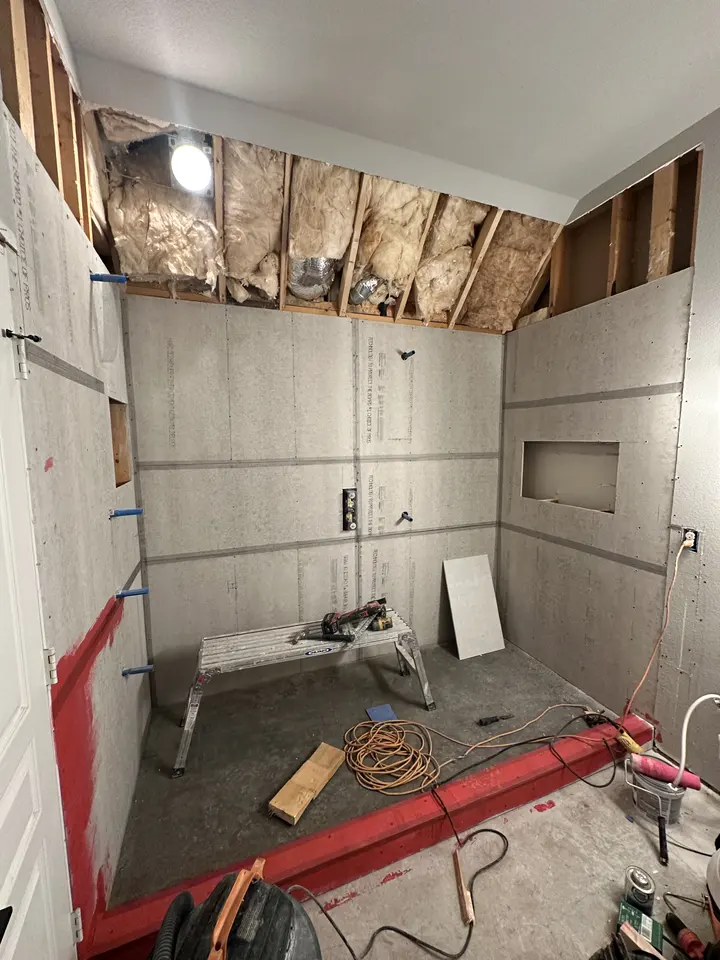
- Cement board on the walls. Cement backer board is screwed to the studs, with its seams taped and filled.
- Waterproofing membrane. A liquid-applied or sheet membrane covers the walls, the floor, the curb and any niche or bench, connected to the drain so water on the membrane has somewhere to go.
- Flood test. The drain is plugged and the floor is filled with water to confirm the pan holds.
- Tile and grout. Tile is set in thinset directly over the membrane, then grouted.
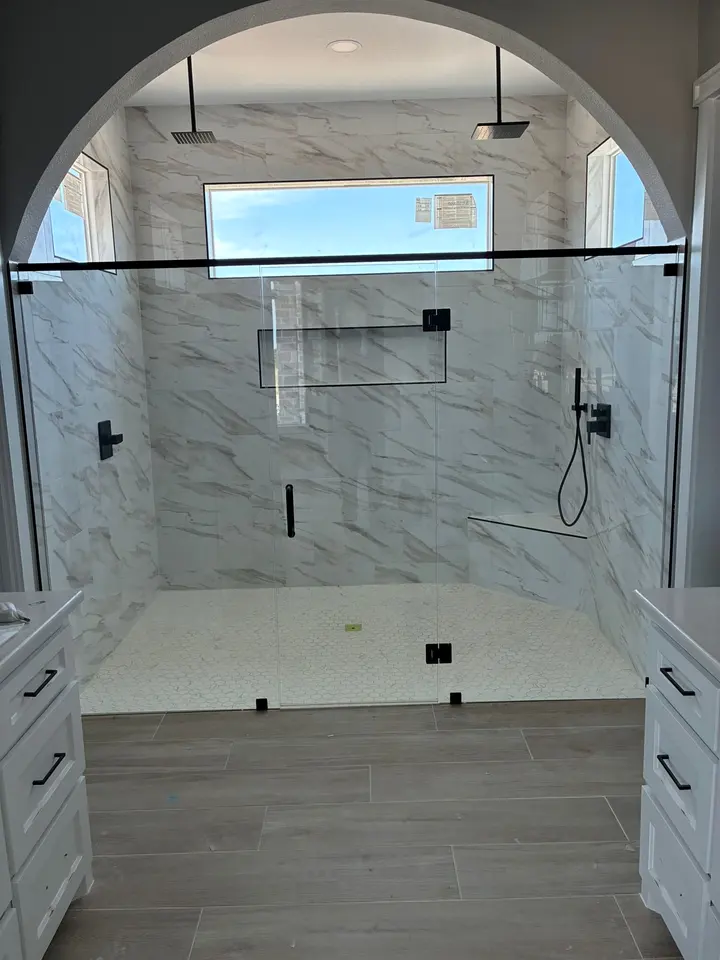
This is the order our own shower builds follow: cement board, a waterproofing membrane over it, then large-format tile. You can see the finished result on our page about tiled walk-in showers with frameless glass.
What is cement board for, if it isn't waterproof?
Cement board is a backer, not a barrier. It is made of cement and reinforcing mesh, so it does not rot, swell or grow mold the way paper-faced drywall does when it gets wet. That makes it a stable, rigid surface for tile.
But water passes through cement board. Left bare behind grout, it simply soaks up moisture and hands it to the studs. That is why the membrane goes over it. Regular drywall, even the moisture-resistant kind, does not belong behind tile inside a shower.
One more detail: when a surface membrane is used on the face of the board, most systems do not want a plastic sheet behind the board as well. Two barriers can trap moisture in between. The membrane maker's instructions decide this, and a good installer follows them.
Liquid membrane or sheet membrane?
Both approaches work when they are installed correctly. The difference lies in how they are applied and where each is easier to get right.
| Liquid-applied membrane | Sheet membrane | |
|---|---|---|
| What it is | A thick coating rolled or brushed on in coats | A thin waterproof fabric bonded to the wall with thinset |
| Seams and corners | Reinforced with fabric at seams, corners and changes of plane | Overlapped seams and pre-formed corner pieces |
| Thickness control | Depends on applying enough coats; checked against the maker's spec | Factory thickness, consistent across the sheet |
| Odd shapes | Easy around pipes, niches and benches | Needs careful cutting and patching around penetrations |
| Cure time | Needs drying time between coats and before tile | Can usually be tiled over sooner |
The weak point in either system is never the flat middle of a wall. It is the transitions: inside corners, the joint between wall and floor, the curb, the edges of a niche, and every pipe that comes through. Those spots get reinforcement, overlaps or pre-formed pieces, and they deserve the most attention during inspection.
How does the shower floor stay dry?
The floor has the hardest job, because water sits on it. It has to slope so nothing ponds, and the membrane has to connect to the drain so any water that gets under the tile is carried away rather than trapped.
The pre-slope
In a traditional build, a sloped mortar bed goes down first, then a liner, then a second mortar bed on top, then tile. In a surface-membrane build, the mortar bed is sloped once and the membrane goes directly on top of it, with tile bonded over the membrane. Either way, the membrane itself must slope toward the drain. A flat liner under a sloped top layer is a classic cause of a shower that smells and never dries out.
Niches, benches and the curb
A recessed niche is a box cut into a waterproof wall, so it is five new surfaces and a dozen corners. Its bottom should pitch slightly toward the shower so water does not sit in it. Benches and curbs get the same treatment: fully wrapped in membrane, with tops sloped to drain back into the shower.
The valve, shower head and other penetrations
Every hole through the membrane is a potential leak. The shower valve, the shower head arm, a handheld outlet and any body sprays all pass through the wall, and each one needs a sealing collar, a pre-formed gasket or a reinforced patch of membrane around it. The valve deserves extra care because its body sits in a larger opening. Trim plates hide these spots once the shower is finished, so they have to be right before tile, not caulked afterward.
The flood test
Before any tile goes on, the drain is plugged and the shower floor is filled with water, commonly left for a full day. If the level drops or a damp spot appears below, the problem is found while it takes an hour to fix instead of a demolition. This is one of the most useful questions you can ask a contractor: do you flood test the pan before tile?
It is also fair to ask for photos of the membrane before tile covers it. A contractor who builds showers properly is usually glad to show that stage, because it is the part of the work you pay for and never see again. Those photos are also useful to keep with your house records if you ever sell.
How can you spot a shower waterproofing problem in an existing bathroom?
If you are considering a remodel partly because the current shower seems off, these are the usual signs:
- Grout lines that stay dark long after the shower has dried.
- Loose, hollow-sounding or cracked tiles, especially low on the walls.
- Caulk that keeps failing at the same corner or along the curb.
- Staining or swelling on the baseboard, door casing or a nearby wall.
- A water mark on the ceiling below an upstairs bathroom.
- A musty smell that returns no matter how often you clean.
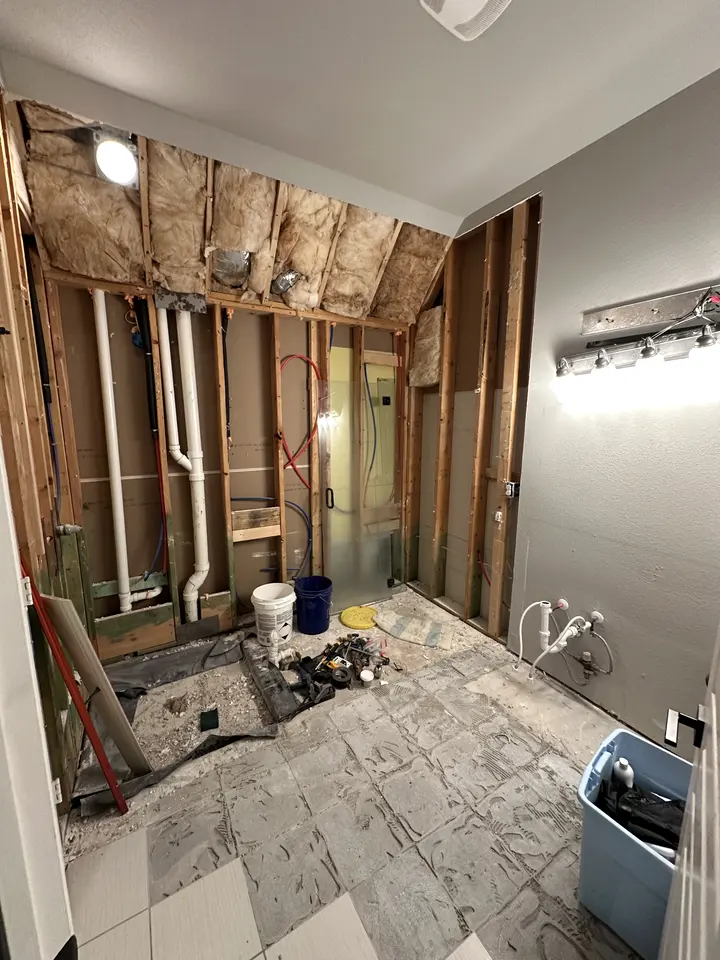
Any of these can mean water is getting past the tile. The only real fix is to remove the tile down to the framing, repair whatever is damaged and rebuild the layers properly. Replacing grout or regrouting over a failed shower only hides the problem for a while. When that rebuild also means replacing a tub, our page on tub replacement with a new tiled shower covers the extra steps.
What to decide before you call for an estimate
Waterproofing is not a finish you choose, but a few choices affect it. Decide whether you want a niche, how many, and where. Decide on a bench, a curb or a curbless entry, and whether the shower will have a linear drain or a center drain. Each of those changes how the membrane is detailed.
Then ask every contractor the same questions: what goes on the walls behind the tile, which membrane they use, how they handle the niche and the valve, and whether they flood test the floor. For the rest of the project, from layout to fixtures, our overview of full bathroom remodels in Dallas–Fort Worth is a good next read. When you are ready, ask for a free written estimate and we will walk you through exactly how your shower would be built.
Questions homeowners ask
Does shower waterproofing need to be redone when you replace tile?
Yes. If the old tile is coming off, the waterproofing behind it is disturbed and cannot be trusted, and in older showers it may never have been there in the first place. The correct approach is to strip the wet area to the framing, repair anything damaged, and rebuild the backer board, membrane and slope before new tile goes on.
Is grout sealer enough to waterproof a shower?
No. Grout sealer reduces staining and slows the rate at which water soaks into grout, but it wears off over time and does not make the grout watertight. It is maintenance for the surface. The protection that keeps water out of your walls has to be a continuous membrane behind the tile.
Can you install tile directly over drywall in a shower?
Not inside the wet area. Paper-faced drywall, including moisture-resistant versions, breaks down and grows mold when it stays damp. Shower walls need a backer that tolerates water, such as cement board, covered with a waterproofing membrane. Drywall is fine on the bathroom walls outside the shower where splashing is limited.