In short
Interior painting prep is the work done before the finish coat: protecting floors and furniture, cleaning walls, repairing holes, cracks and nail pops, sanding, caulking trim gaps and spot-priming repairs. It takes more time than the painting itself on many jobs. Skipping it is what causes visible patches, peeling trim, rough walls and paint on the floor.
Key takeaways
- On most interior jobs, prep takes as long as or longer than applying paint, and it decides how the finished walls look.
- Repairs need to be sanded smooth and spot-primed, or they show through the new paint as dull or textured patches.
- Caulking gaps between trim and walls is what makes painted trim look crisp and continuous.
- Floors, furniture and fixtures should be fully protected and the work area cleaned every day.
Most people have seen a paint job that looked fine for a week and then started to bother them. Patches that show as shiny squares when the afternoon sun hits the wall. Nail holes still visible in the baseboards. A thin line of wall color on the ceiling. Paint drips on the tile. Trim that peels where it was painted over something glossy.
Nearly all of that comes down to interior painting prep, the part of the job that happens before the finish coat. The paint itself matters, but a premium paint over a poorly prepared wall will still look like a poorly prepared wall. Here is what careful prep looks like, step by step, and what tends to get skipped when a job is rushed.
Why does prep matter more than the paint?
Paint is a thin film. It does not fill dents, flatten patches or hide cracks. It follows the surface underneath exactly, and in many cases it makes defects more visible by giving them an even color and sheen that catches light.
Paint also needs something clean and sound to hold on to. Dust, kitchen grease, soap film in bathrooms and glossy old finishes all weaken the bond. When the bond fails, the result is peeling, chipping or paint that scrapes off with a fingernail.
That is why, on a typical room, the hours spent moving, covering, cleaning, patching, sanding and caulking can match or exceed the hours spent rolling and brushing. When one estimate is much quicker than another, the difference is usually in this part of the work.
How should the room be protected?
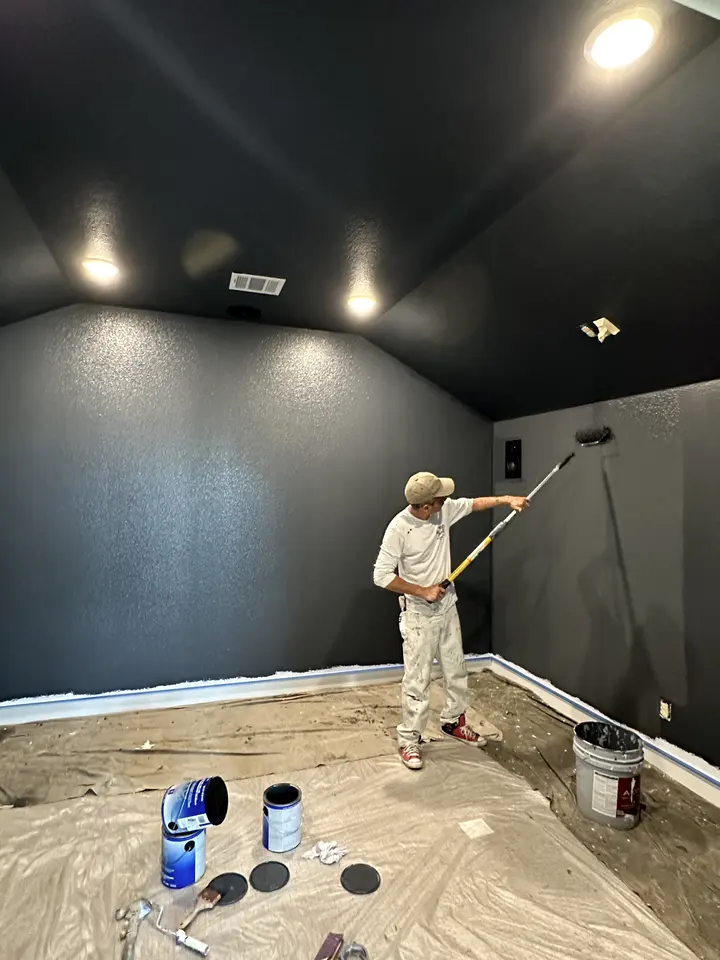
Before anything is sanded or opened, the room gets set up so that the only thing that changes is the walls.
- Furniture is moved to the center of the room or out entirely, then covered with plastic or clean drop cloths.
- Floors are covered wall to wall with canvas drops or protective paper, taped at the edges on hard floors so nothing slips under.
- Outlet and switch covers are removed, not painted around, and the devices are masked.
- Hardware such as door knobs, hinges where needed, and cabinet pulls is removed or masked.
- Light fixtures and vents are covered or loosened so the paint reaches the wall behind them.
- Adjacent rooms are protected from dust with plastic where sanding will be heavy.
At Legacy Home Solutions we protect floors and rooms before starting and clean the work area every day. A painter who shows up and starts cutting in without drop cloths is telling you how the rest of the job will go.
Interior painting prep, step by step
Every house is different, but careful prep on interior walls and trim follows roughly this order:
- Inspect with a work light. Holding a light flat against the wall shows dents, ridges and old patches that are invisible from the middle of the room. Problem spots get marked.
- Clean. Kitchens, bathrooms, hallways and areas around switches get washed to remove grease, soap film and hand marks. Dust is wiped from baseboards and door tops.
- Fix nail pops and loose tape. Popped drywall fasteners are reset or replaced with screws, then covered. Loose or bubbled joint tape is cut out and re-taped.
- Fill holes and dents. Small holes get spackle; larger damage gets joint compound, a patch or a new piece of drywall.
- Match texture. On textured walls, repaired areas are re-textured to blend with the surrounding wall.
- Sand. Patches are sanded flush and walls are lightly scuffed where needed. Glossy trim is scuff-sanded so new paint grips.
- Caulk. Gaps between baseboards, casings, crown and the wall are caulked with a paintable caulk, along with open miters in trim.
- Spot-prime. Every patch, bare spot and stain gets primer before the finish coats.
- Remove dust and mask. Walls and trim are wiped down, and edges are masked where a straight line cannot be cut by hand.
Drying time is part of the sequence too. Joint compound, deeper fills and primer all need to dry fully before sanding or painting over them, and thick patches may need a second pass once the first one shrinks. Rushing these steps is how a patch that looked flat ends up with a visible dimple under the finish coat.
Only then does the first finish coat go on. You can see how this fits into a full project on our step-by-step project process page.
When does a wall need primer?
Not every repaint needs a full coat of primer, but some situations always do. Spot-priming repairs is standard on any job; full priming depends on what is underneath.
- New drywall or large patches. Bare drywall paper and joint compound absorb paint differently, which causes a dull, blotchy look called flashing. A drywall primer evens that out.
- Stains. Water marks, smoke, marker and some wood knots bleed through latex paint. They need a stain-blocking primer.
- Glossy or oil-based surfaces. Older trim and doors are often oil-based. Water-based paint applied straight over them can peel, so they are scuff-sanded and coated with a bonding primer.
- Big color changes. Going from a deep color to a light one, or the reverse, often benefits from a tinted primer so the new color reaches full coverage in fewer coats.
A quick test for old oil paint on trim is to rub a small spot with a cotton pad and rubbing alcohol. Water-based paint usually softens and transfers; oil-based paint does not.
What does a quick job usually skip?
| Step | Careful job | Quick job |
|---|---|---|
| Protection | Floors covered wall to wall, furniture wrapped | A drop cloth moved around as needed |
| Outlet covers | Removed and stored | Painted around or over |
| Repairs | Filled, sanded flush, texture matched | Filled, not sanded |
| Primer | Every patch spot-primed | Finish coat straight over patches |
| Caulk | All trim gaps and miters caulked | Only obvious gaps, or none |
| Glossy trim | Scuff-sanded, bonding primer where needed | Painted directly |
| Coats | Two full coats, recoat time respected | One coat, or a second coat too soon |
| Cleanup | Daily, with a final walkthrough | At the end, if at all |
None of the shortcuts are obvious on day one. They show up weeks later, when the light changes or the first time someone wipes a wall.
What should you do before the painters arrive?
A little homeowner prep keeps the schedule on track and protects things only you know how to handle:
- Take down art, mirrors, curtains and blinds, or ask whether the crew will.
- Pack away small items, electronics and anything fragile from shelves and surfaces.
- Decide which wall anchors and hooks should be removed and patched, and which should stay.
- Point out any known issues, like a ceiling stain from an old leak or a crack that keeps coming back.
- Plan for pets and kids to stay out of the work area, especially while paint is wet.
- Have your color and sheen choices confirmed for each room and surface.
If a crack keeps reopening in the same spot, mention it early. Recurring cracks over doors and windows are often related to seasonal soil movement, which is common in parts of North Texas. They may need a flexible repair rather than a standard patch.
How can you check the prep was done right?
You do not need to be a painter to judge prep. After the job, walk the rooms with these checks:
- Look along each wall at a low angle toward a window. Patches should not show as shiny, dull or textured spots.
- Check the line where the wall meets the ceiling. It should be straight and clean.
- Look at baseboards and casings from standing height. Nail holes should be filled and joints caulked.
- Look at floors, outlets, hinges and fixtures for paint where it should not be.
- Open and close doors to make sure fresh paint on the edges is not sticking.
If something on that list looks off, raise it while the crew and materials are still on site. Small touch-ups are easy then and much harder once the drop cloths are gone. Our page on interior painting for occupied homes explains how we handle the work from setup to cleanup.
What to decide before calling for an estimate
An accurate estimate depends on knowing the condition of the walls, so it helps to note:
- Which rooms, and whether ceilings, trim, doors or closets are included.
- Known damage: holes from mounted TVs, water stains, cracks, nail pops.
- Whether the room is furnished and what needs to be moved.
- Any color changes, especially dark to light or light to dark.
You can read more about our residential painting work in Dallas-Fort Worth, then ask for a free, written painting estimate. Point out the problem areas during the visit so the repairs and prep are spelled out in the written estimate and you know what you are paying for.
Questions homeowners ask
How long does interior painting prep take?
It depends on the condition of the walls. A room with few repairs may need a few hours of setup, cleaning and caulking. A room with many holes, cracks, stains or glossy trim may need most of a day before painting begins, plus drying time for patches and primer. Prep is often as long as the painting itself.
Is interior painting prep something I can do myself to save time?
You can clear the room, take down art and curtains, and pack small items. Leave the repairs, sanding, caulking and priming to the painter, since they are responsible for how the finish looks and need to see the condition of the walls. Patches done by someone else can show through if they are not sanded and primed correctly.
Why is my new paint peeling off the trim?
Peeling trim is usually a bonding problem. Water-based paint was likely applied over old oil-based or glossy paint without scuff-sanding and a bonding primer. The fix is to remove loose paint, sand the edges smooth, prime with a bonding primer and repaint. It is avoidable with proper prep.